Thursday, December 1, 2011

Quick Homemade Wooden Handplane

Being able to build your own handplanes not only adds versatility to your work it is an affordable alternative to buying a high quality plane. Also, building and maintaining your own tools just makes you a better woodworker period. The skill of the craftsman is directly correlated (as far as I can tell) to the intimacy that is cultivated between himself and his work. Building your own tools and using them is a great joy.

I pretty much learned how to build handplanes from David Finck's excellent book Making and Mastering Wood Planes. It is just an excellent resource for any serious woodworker who wishes to bring his artistry to the next level. Just go buy it if you haven't.

I have a slightly different design then David's and the planes, in particular, the planes I build don't use a chip breaker (because of the thickness of the blades eliminates "chatter" and also the fineness of the throats and cuts these planes take).

My only criticism of his book is that it doesn't really cover building any type of plane beyond the basic flat bottom planes (he briefly touches upon rocker bottom planes). In the future I may post on how I build some other types of planes.


Making a basic smoother. 
This one will be made of ash.  Blank starts at 6.5" wide and 2" thick.
I think it is a bit over a foot long.


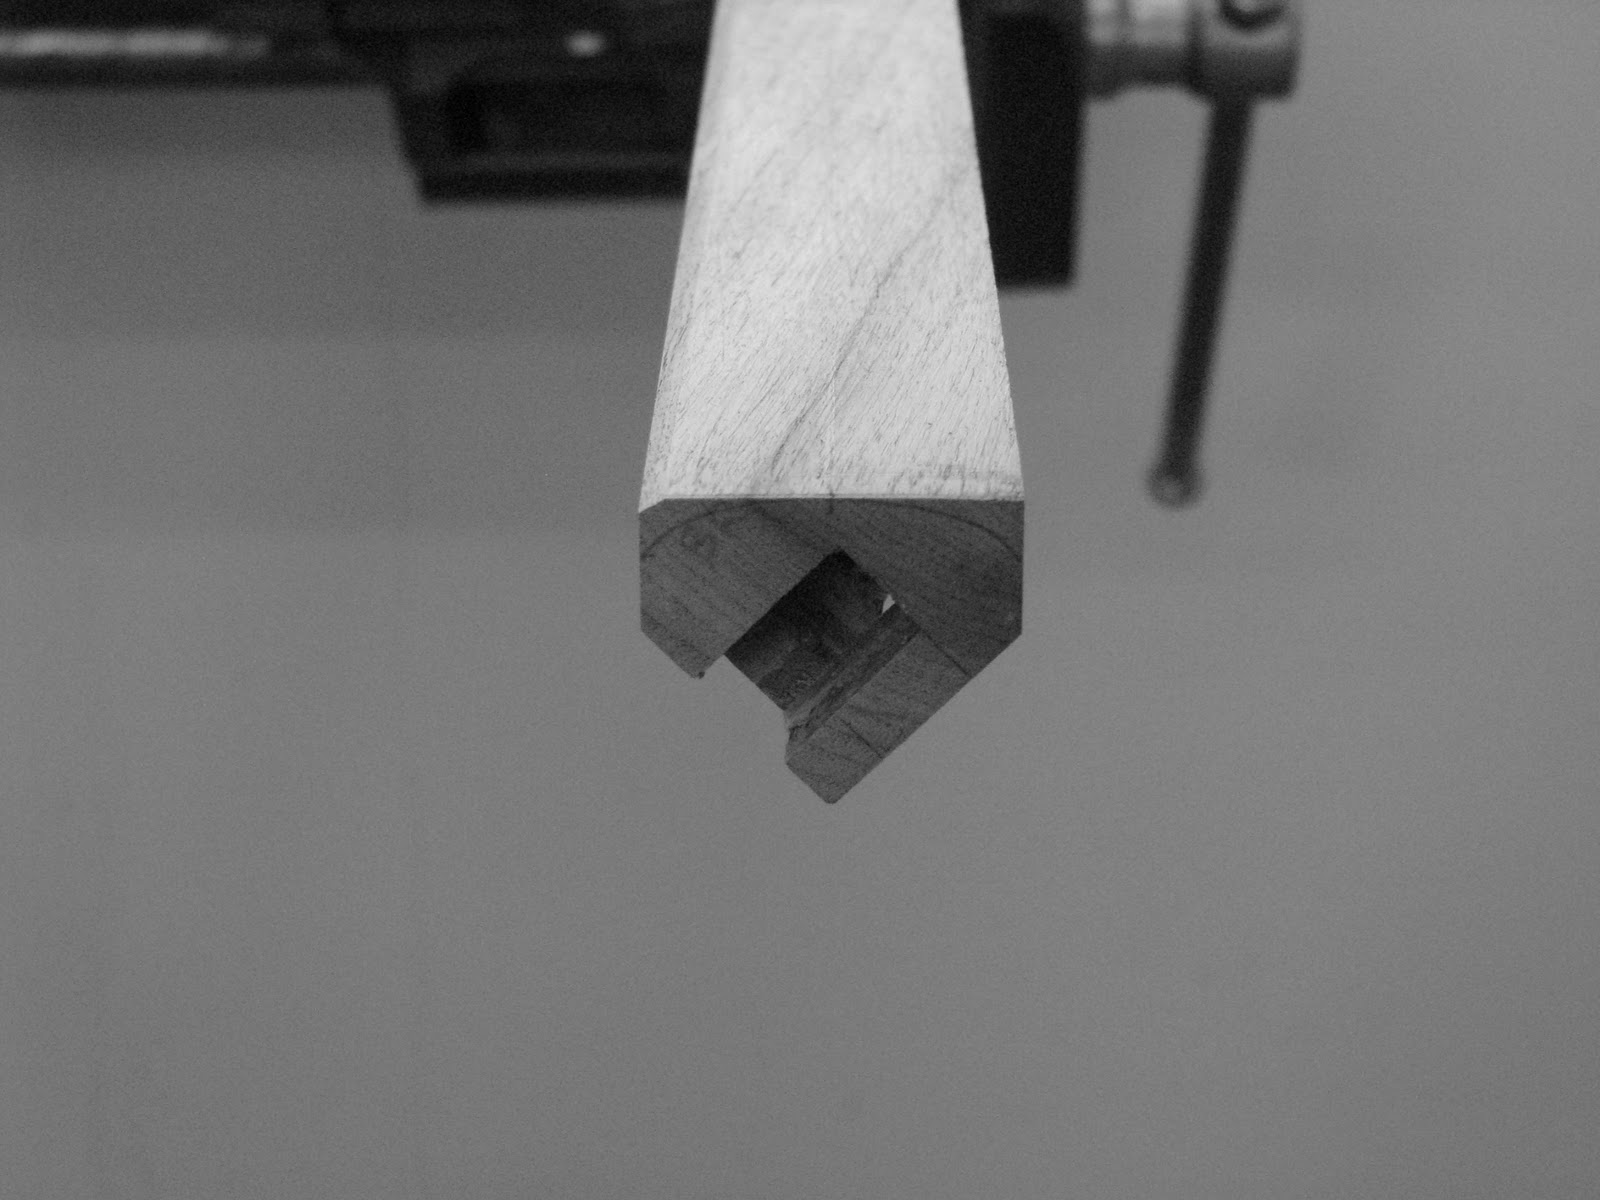
The blank has been sawn in half and is sitting on edge.  
A previous smoother I built earlier is next to it for scale.


Halves are glued up.


Side cheeks are sawn off. The 2" iron I will be using is sitting on top.


This is the middle section of the plane.
 I have removed the sides and sketched on the bed angle.


I like laying the iron I will be using on the blank to make sure everything looks good


Here I have cut away the middle waste portion.
The front ramp is coved out to allow for easy shaving removal.
For an easy stress free glue up registration pins were drilled into 
the four corners before the middle was cut into pieces.


A dry fit.


Sorry I forgot to photograph the making of the cross pin.
It is very straight forward, just dowel a piece of wood into place with
enough room for a wedge to hold the iron.  Don't glue the dowel in, the cross pin
should be able to rotate.


Very roughly shaped.
I may refine the shape later... or I may not.


Notice the throat... quite tight.
This is the hardest part. 


Really planes are easy to build
#1:  Make sure the bottom is flat,
#2:  Make sure the blade is sharp and finely set,
#3 Lastly, make sure the throat is tight as possible.


I ended up opening the throat up a bit more from then the .002 pictured here.
I ended up filing this one to around .003-.004 inches open.
The shavings binded in the opening if I went any tighter.


The finished plane with wedge. The cross pin was slightly off so the wedge
had to be tapered to ensure a snug hold on the iron. The tapering
was easily accomplished with a handplane.


Some moderately thin shavings.
The shavings are ash so they look woodier then they actually are.


The smoother works!

I know this walk through was very rough. I glossed over the actually difficult moments in the building of this plane. By far the most critical/difficult part of plan making is accurately and finely opening the throat of the plane. I will probably post more thorough walk throughs of building a plane in the future.  In the meantime, the chest of drawers is complete and awaiting final photography.

Wednesday, November 16, 2011

Chest of Drawers Part 3: Drawers and Details

Now on to the drawers.


The tools used.


Cutting the tails.


When working with stock this thin, we chop the tails with a chisel.


Some of the completed sides


Chopping out the half blind dovetails for the front.


A neat fit.  Now for the backs.


Having the front of the drawer dry fit makes laying out the back pins easier


Laying out the back pins


Some of the drawers partially assembled


Now that the drawers are glued up the joints are hand planed flush.
This simple bench-hook with a supporting sawhorse underneath
 makes awkward clamping unnecessary.


We didn't have to use any sand-paper on this piece... it is all blade finished.


The drawers are fit by handplane using the same bench-hook set up.


Ian turned the knobs.  (He always gets the easy jobs.)


Next up.... the top, details, and finishing.

Friday, November 11, 2011

Chest of Drawers Part 2: Roughing Out

May as well jump right into the WIP photos for the chest of drawers we are currently working on...


All of this is 1" thick walnut except for the board on the right, which is the 2" leg stock.


These boards have been laid out for the drawer fronts.
The grain will run seamlessly across the front of the piece.


The rough cut drawer fronts.

Keeping the drawer grain flowing across the fronts of the drawers is the kind of thing that woodworkers appreciate and no one else notices... until you point it out to them, and then they can't not notice it from that point onward.


The side panel stock before it is cut and resawn. A single board will be cut and
"slip matched" (rotated as the arrows indicate) to maintain harmonious grain across the panel. 


The rough panel before being resawn


The resawn halves. Now the grain will match on both sides


The glued up side panels.

    Now that the panels are constructed, onto the legs....


Because the legs are angled outward at 45 degrees we built this 45 degree
sled to simplify cutting the mortices. The protrusions from the sled are for clamping
the sled to fences for machining.


Here the legs are being morticed by our vertical morticer.


Here are the legs with 45 degree shoulders cut into them along with the mortices.


The 45 degree shoulders were cut on the tablesaw and then
finished with a handsaw.  Now to shape the outside sides.


Ian uses a spokeshave to shape the outsides of the legs.


If you look closely at this picture you can see the line Ian
sketched onto the leg blank to cut to.


The spokeshave and block plane are the only tools used
to cut away the waste from the blank. We did not use any sandpaper on this whole piece.


The final profile of the bottom of the leg.


The facet is cut with a very sharp chisel.


The small facets will remain from the tool. It would be a shame to sand this
curve smooth, the facets should remain as a testament to the skill of the craftsman.


It is starting to come together. The panels will be added to the piece when
they are out of clamps.


Friday, November 4, 2011

Chest of Drawers Part 1: Mock-Up

    As my brother have stated before, we design our furniture primarily in the physical world through the process of building mock-ups.  We start with a very rough mock-up of the furniture form we are working on. In the case of the chest of drawers it began as a box, roughly the size we wanted, tacked together out of very thin plywood. Then we refine and re-mock the form by trying different leg treatments, different drawer arrangements, different knobs, etc... until we arrive at the form we feel fits the mood of the piece we were looking to build. We prefer this method because it is direct. When building in this way we are able to understand the volume and proportions of our furniture at human scale. How the volume of our chest of drawers feels, the feel of how a knob fits the hand, the direct experience of furniture is what differentiates it from fine art sculpture. You are meant to touch. Gauging the "feel" of something is impossible within the white plastic realm of 3D modeling or on the flat page of a sketchbook.


 Here is a series of pictures of our mock-ups for the chest of drawers we're currently working on...


In the first picture you can see the basic rectangular volume we have settled on with a few different leg options. The second picture is Ian determining the size and placement of a side rail. By composing in material there is less guesswork and more handwork.


The top left photo is the (rough) top treatment along and the top right photo is a possible drawer arrangement sketched onto brown paper that has been stretched over the face of the chest.  This drawer arrangement is an arrangement I designed some time ago, and I am glad we are finally going to be able to see and feel it in action. I will post more about this drawer arrangement later.


Here are three different leg options we toyed with (note the two different ones in the picture on the left,) I think we mocked-up roughly eight different leg options by the end of the design process. The mocked-up legs are simply made out of trued 2x4s that had been cut in half, shaped in a variety of ways and then screwed into the sides of the mock up. Building the actual mock up took no time at all, fine tuning our design decisions and preparing to buy the wood was a good day or two of work.

    Because this chest of drawers is  something we are building as a kind of "stock" piece of furniture that will be able to recreate on demand at a modest price, we are keeping everything very straightforward. The next chest of drawers build will be a one-of-a-kind piece of furniture with a much more involved and challenging design/construction process.