I pretty much learned how to build handplanes from David Finck's excellent book Making and Mastering Wood Planes. It is just an excellent resource for any serious woodworker who wishes to bring his artistry to the next level. Just go buy it if you haven't.
I have a slightly different design then David's and the planes, in particular, the planes I build don't use a chip breaker (because of the thickness of the blades eliminates "chatter" and also the fineness of the throats and cuts these planes take).
My only criticism of his book is that it doesn't really cover building any type of plane beyond the basic flat bottom planes (he briefly touches upon rocker bottom planes). In the future I may post on how I build some other types of planes.
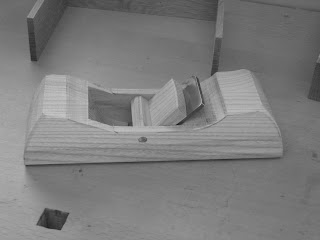
Making a basic smoother.
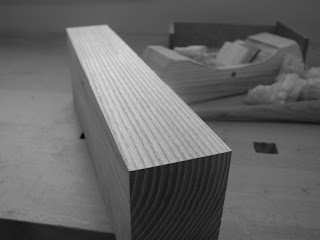
This one will be made of ash. Blank starts at 6.5" wide and 2" thick.
I think it is a bit over a foot long.
The blank has been sawn in half and is sitting on edge.
A previous smoother I built earlier is next to it for scale.
Halves are glued up.
Side cheeks are sawn off. The 2" iron I will be using is sitting on top.
This is the middle section of the plane.
I have removed the sides and sketched on the bed angle.
I like laying the iron I will be using on the blank to make sure everything looks good
Here I have cut away the middle waste portion.
The front ramp is coved out to allow for easy shaving removal.
For an easy stress free glue up registration pins were drilled into
the four corners before the middle was cut into pieces.
A dry fit.
Sorry I forgot to photograph the making of the cross pin.
It is very straight forward, just dowel a piece of wood into place with
enough room for a wedge to hold the iron. Don't glue the dowel in, the cross pin
should be able to rotate.
Very roughly shaped.
I may refine the shape later... or I may not.
Notice the throat... quite tight.
This is the hardest part.
Really planes are easy to build
#1: Make sure the bottom is flat,
#2: Make sure the blade is sharp and finely set,
#3 Lastly, make sure the throat is tight as possible.
I ended up opening the throat up a bit more from then the .002 pictured here.
I ended up filing this one to around .003-.004 inches open.
The shavings binded in the opening if I went any tighter.
The finished plane with wedge. The cross pin was slightly off so the wedge
had to be tapered to ensure a snug hold on the iron. The tapering
was easily accomplished with a handplane.
Some moderately thin shavings.
The shavings are ash so they look woodier then they actually are.
The smoother works!
I know this walk through was very rough. I glossed over the actually difficult moments in the building of this plane. By far the most critical/difficult part of plan making is accurately and finely opening the throat of the plane. I will probably post more thorough walk throughs of building a plane in the future. In the meantime, the chest of drawers is complete and awaiting final photography.


